Filters in Shoprocket are a fantastic tool to make product navigation more accessible and shopping more pleasant for your customers. They work as key-value pairs that can be assigned to products, allowing customers to filter the product list based on their preferences. Here's a step-by-step guide on how to create and manage filters in your store.
Step 1: Navigate to the Edit Product View
First, log into your Shoprocket dashboard and navigate to the "Products" section. Choose a product you want to add filters to and click "Edit".
Step 2: Navigate to the "Other" Tab
Within the "Edit Product" view, find and click the "Other" tab. This is where we will create our product filters.
Step 3: Scroll Down to the "Filters" Section
In the "Other" tab, scroll down until you find the "Filters" section. Here you can create new filters by adding a meta key (the name of the filter) and meta values (the available options for the filter).
For example, you may create a filter called "brand" with a meta value of "Nike", or "volume" with a meta value of "100ml".
Step 4: Add Your Filters
Type the name of your filter into the "meta key" field, and your filter values into the "meta values" field. You can add multiple filter values to a single product, simply separate each value with a comma.
Step 5: Save Your Product
Once you have added all your filters, remember to click "Save" to update your product.
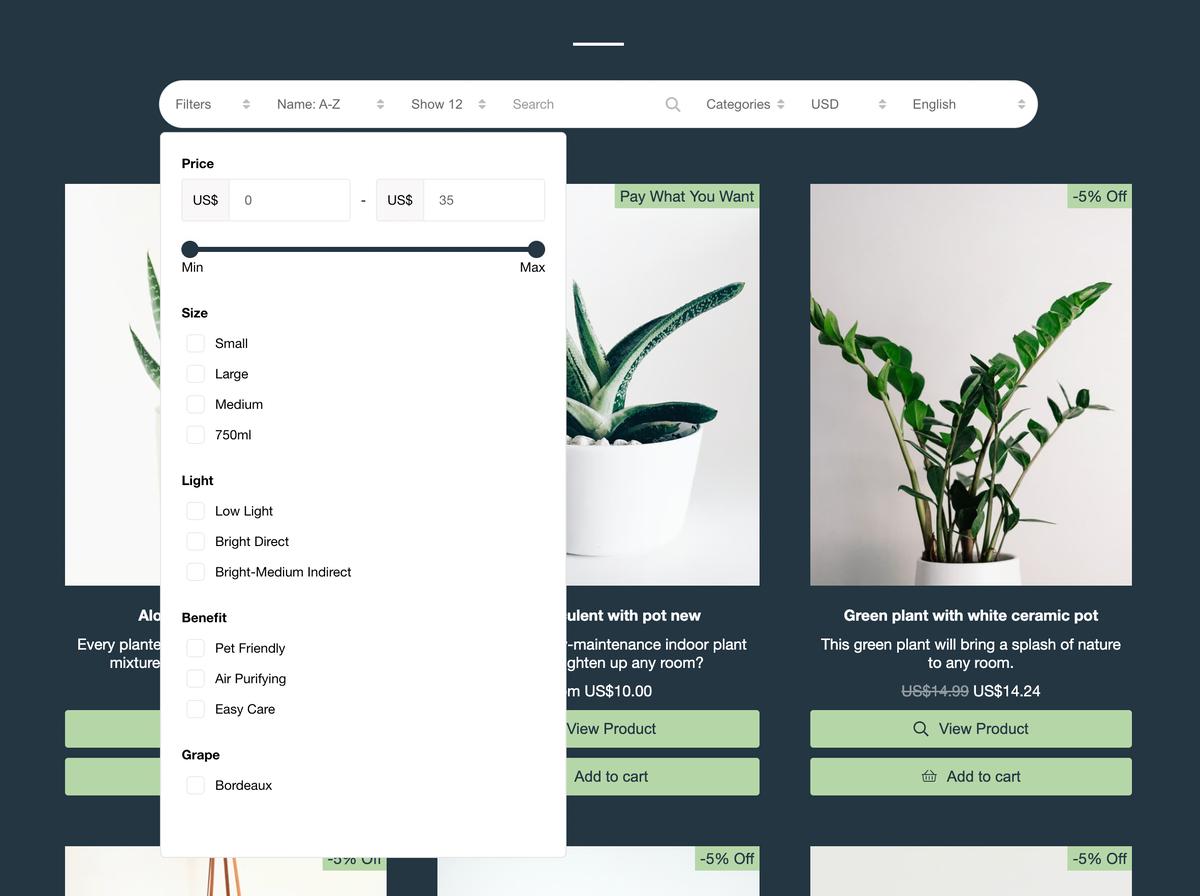
Your filters will now be available in your storefront, and can be accessed from the "Filters" dropdown.
Here's an example of how it should look: (the price filter is included by default)

Step 6: View & Manage Filters
You can also view and manage all your filters in one place. From your Shoprocket dashboard, navigate to "Products", then "Filters". This will show you a list of all filters in your store. Here you can edit or delete filters as needed.
And that's it! With this simple feature, you can greatly improve the shopping experience on your website, making it easier for customers to find exactly what they are looking for. Happy selling!


